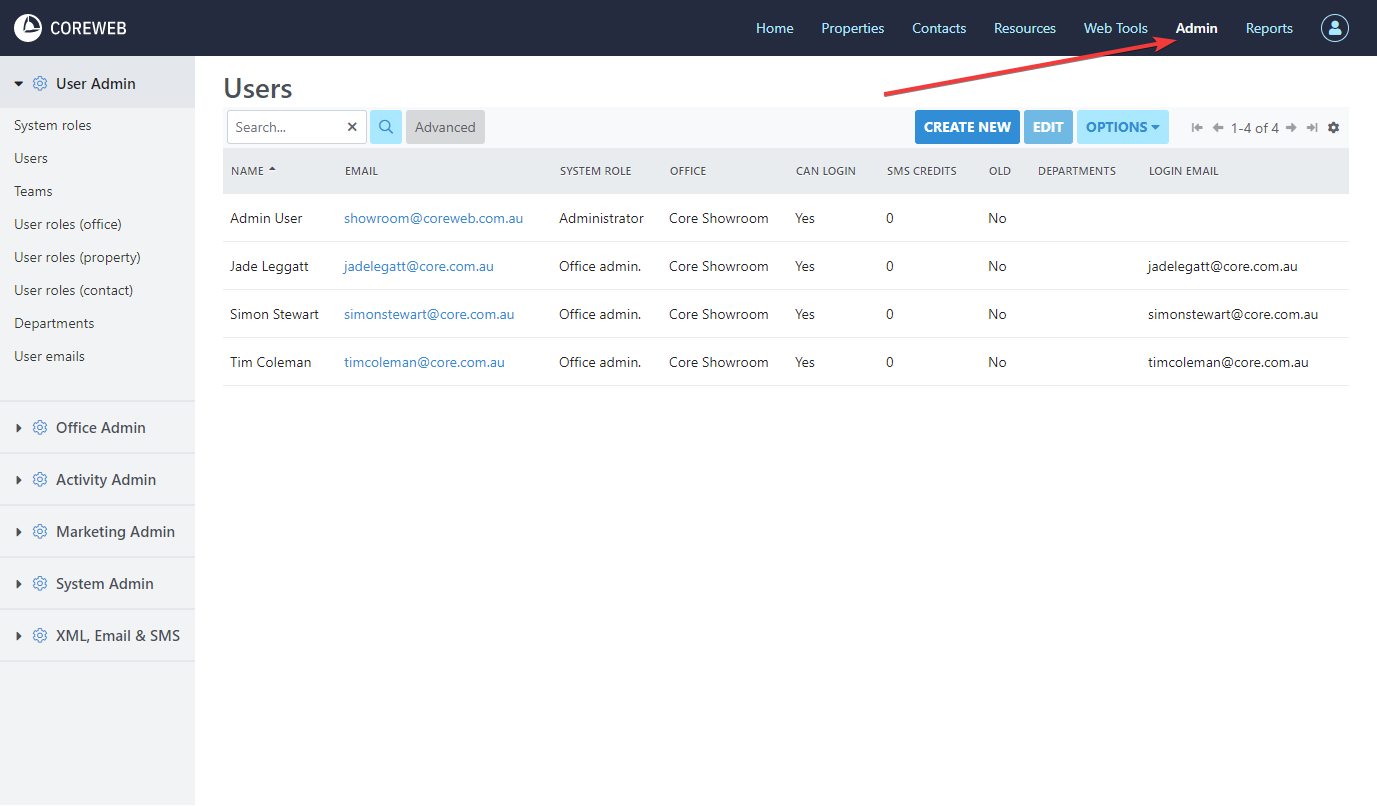
The Admin page is designed to help you manage all aspects of configuration before you start using the fundamental features of the Core system. This is where your lists, types, templates etc are all set up. Clicking Admin defaults you to your agencies User area. From here you can “Create New” User, Edit a User or send them an Email or SMS if you have this configured.
Create New
Purpose
To create a new User of the Core system and configure their individual settings and permissions.
Details Tab Instructions
Note: From here you need a First Name, Surname and Office. Email and Mobile need to be filled if you wish to communicate through the system to this User. The other important setting here is “Can Log In” which allows the User to authenticate with the system and use it. If you do not tick this it allows you to associate things with that person for record keeping purposes, but they would not be able to log in to use the functionality. “Log in email” is the email address they will use to log in, and the password below this. The password can be changed by the User afterwards through the “Me” menu. Passwords do require a certain level of complexity, explained next to the password setting.
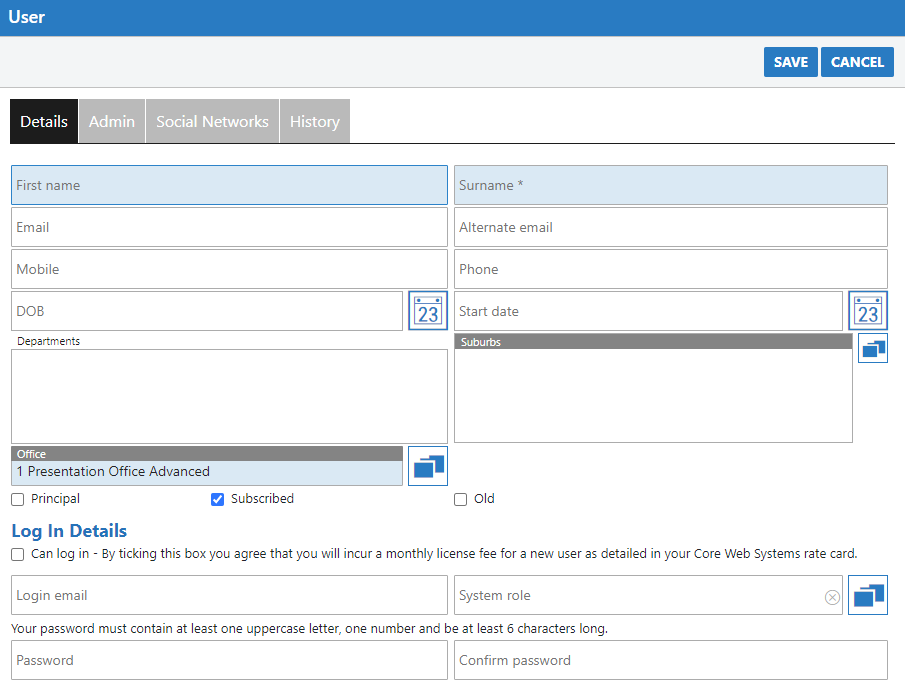
- Clicking Create New brings you to the new User screen. Enter a First Name, Surname and Office as a minimum
- Decide whether or not your User needs to “log in” either check/uncheck this box.
- Select a Department or System Role. Both require pre-configuration.
- Once you have filled in all of the information, press Save and your user will be created. You can provide them with the password you have assigned and they will be able to log in.
Admin Tab Instructions
Note: This section is where we configure the individual User’s connections to 3rd party tools eg CampaignTrack, RP Data, Chameleon, ActivePipe etc. On this screen you can also select their Open Home and Vendor Report SMS templates. Finally, you can also enable Open Home and Daily Task notification.
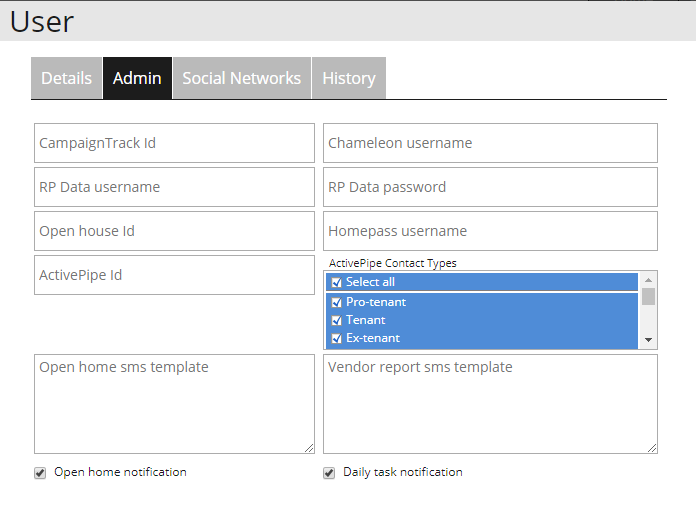
- Enter the appropriate information in, and press Save. You do not need to have anything entered here unless using these specific tools
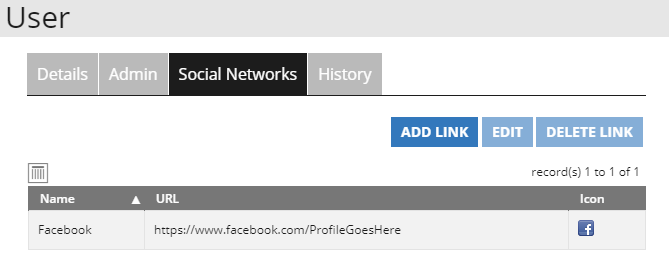
Social Networks Tab Instructions
These options are not clickable until the User has been created. Once created, use the Edit functionality below to modify. Below is an example of what can be seen via the Edit option:
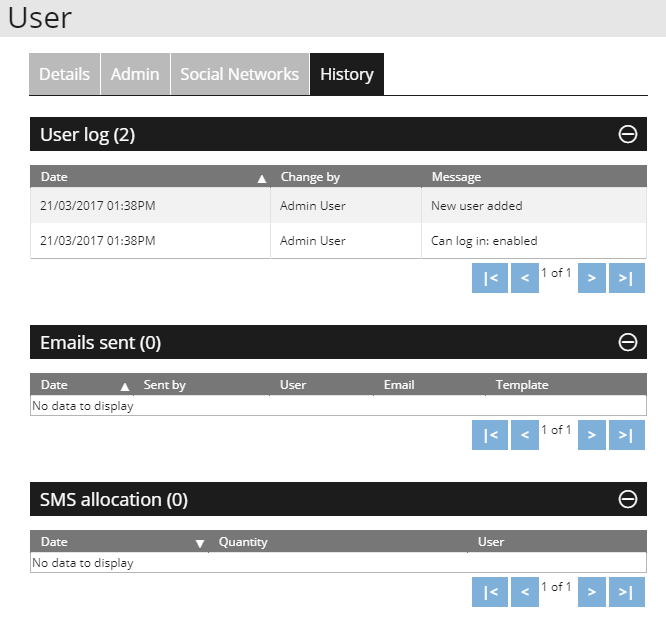
History Tab Instructions
These options are not clickable until the User has been created. Once created, you are best to double click a User and browse to the History tab. Below is an example of what can be seen:
User Log – Dates, Who made modifications, and what they were
Emails Sent – List of User emails sent
SMS Allocation – The history of allocated SMS credit for the User
Edit
Purpose
To edit the details of a User that has already been created. This performs the same function as double-clicking a user and instructions are the same as when originally creating a User. The only setting here specific to Edit is the Social Networks Tab which is accessible only after a User has been created and Saved. Instructions for this tab are below
Social Media Tab Instructions
Used to display social media links under your Agent profile on your Agency web site.
- Under the social media tab, press “Add Link”

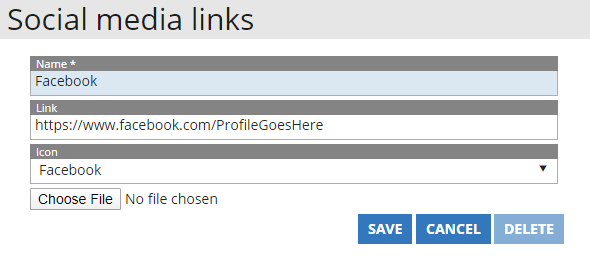
- Give your Social Media Link a name. This could be as simple as writing Facebook. You will also need to provide a link for it to point to. As an example for Facebook it may look something like “https://www.facebook.com/ProfileGoesHere” The name of your profile replacing “ProfileGoesHere” Next pick an icon – again in this example we are using Facebook, so choose this from the dropdown. Alternatively you can upload an icon yourself using the Choose File link. See example of all fields filled below:
- Once you are done, press Save. Add as many Social links as you like to your User profile
Options Dropdown Menu
Purpose
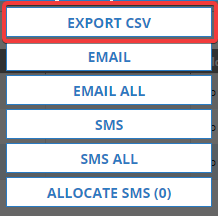
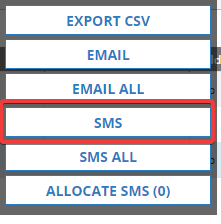
A drop-down menu containing selectable items that depend on your User access level. Options available include Export CSV, Email, Email All, SMS, SMS All and Allocate SMS
Export CSV Instructions
- Clicking Export CSV will automatically download a CSV (spreadsheet) of all Users on your screen. This is handy if you are looking at a multitude of Users and wish to be able to send them, or sort them by specific criteria
Email Instructions
In this circumstance, when in the User Admin section, Email and Email All can be used to send out mass electronic mail communication to your agencies employees. Emails can also be used to communicate with Contacts, which will be covered in the Contacts Menu Guide
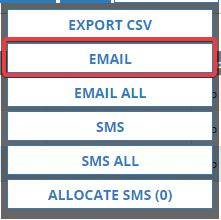
- Select one, or several Users in the User list. To select more than one, hold the control key on your keyboard prior to clicking, then let go once you’ve selected who you want. The “Email” option appears once you have a User(s) selected. Press this
- Next you are asked to choose an Email Template. There are two parts to this, both needing to have been preconfigured prior. Standard Text via Marketing Admin/Email Standard Text” section, and the Email Template via the Marketing Admin/Email Templates section. Example below:
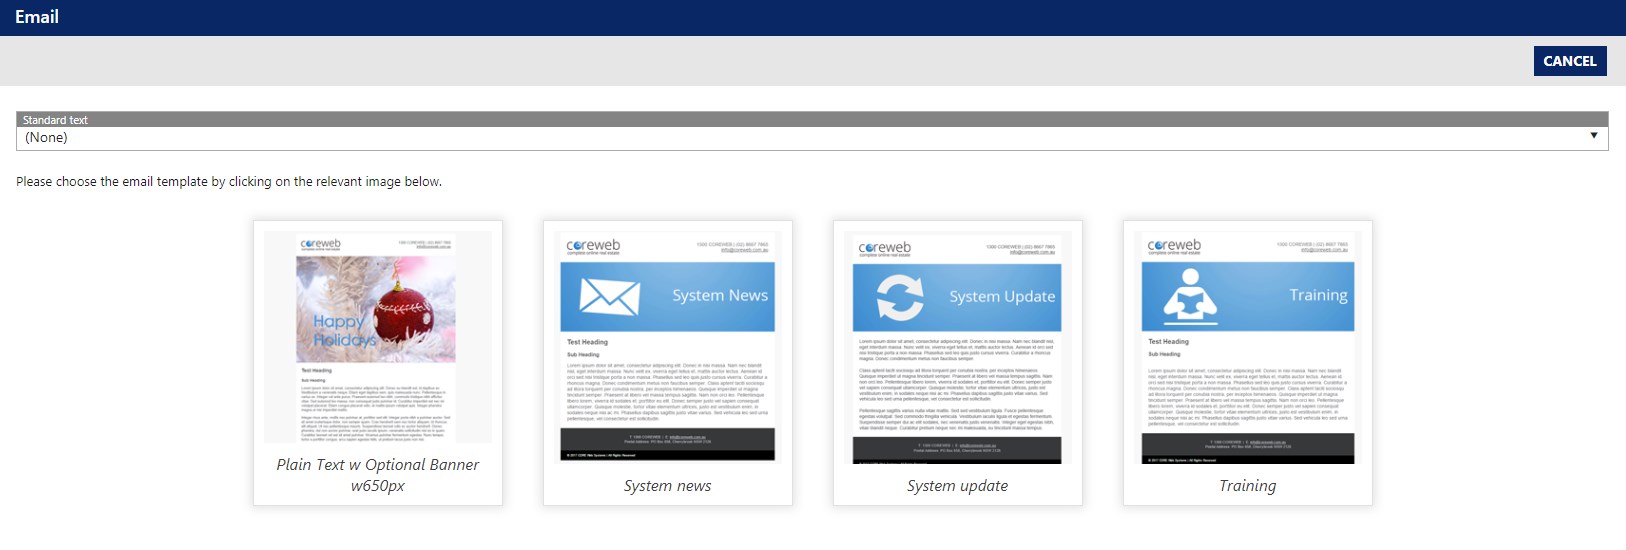
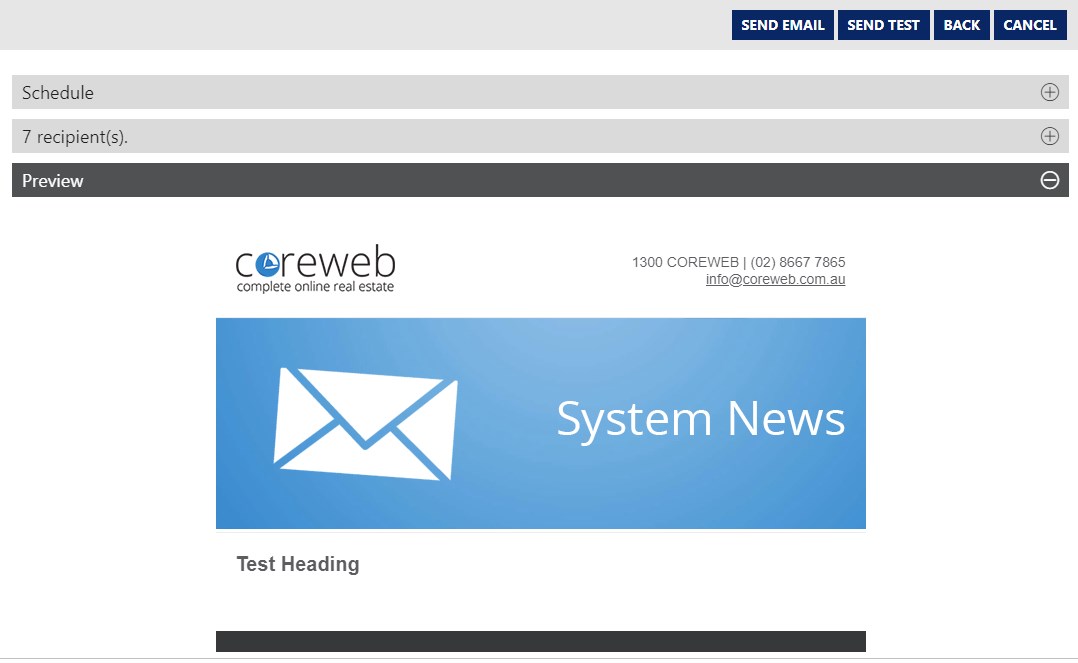
- In this example we will send out an email with our preconfigured System News template. Once you click the template you are presented with the following screen. Your list of recipients will be displayed here. You can add more people, or remove them if needed.
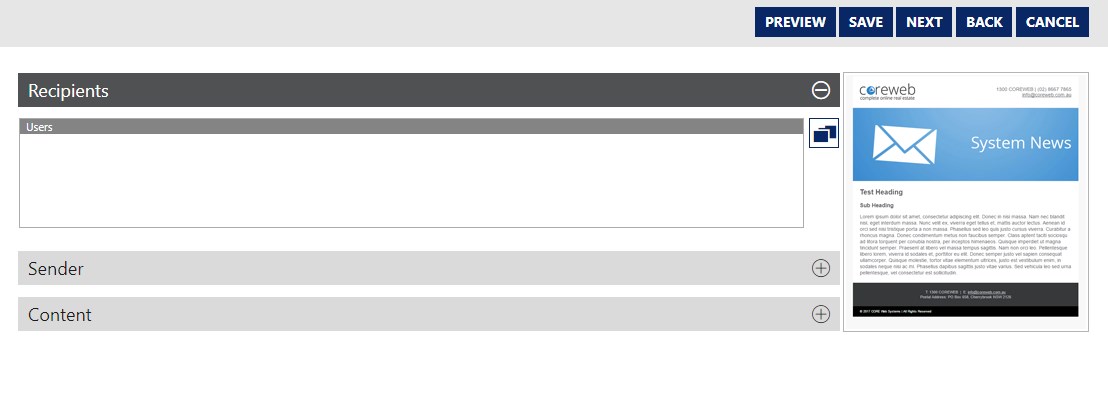
- Expand the Sender section to choose who the email will appear to be from, and the Content section to edit the body of your email.
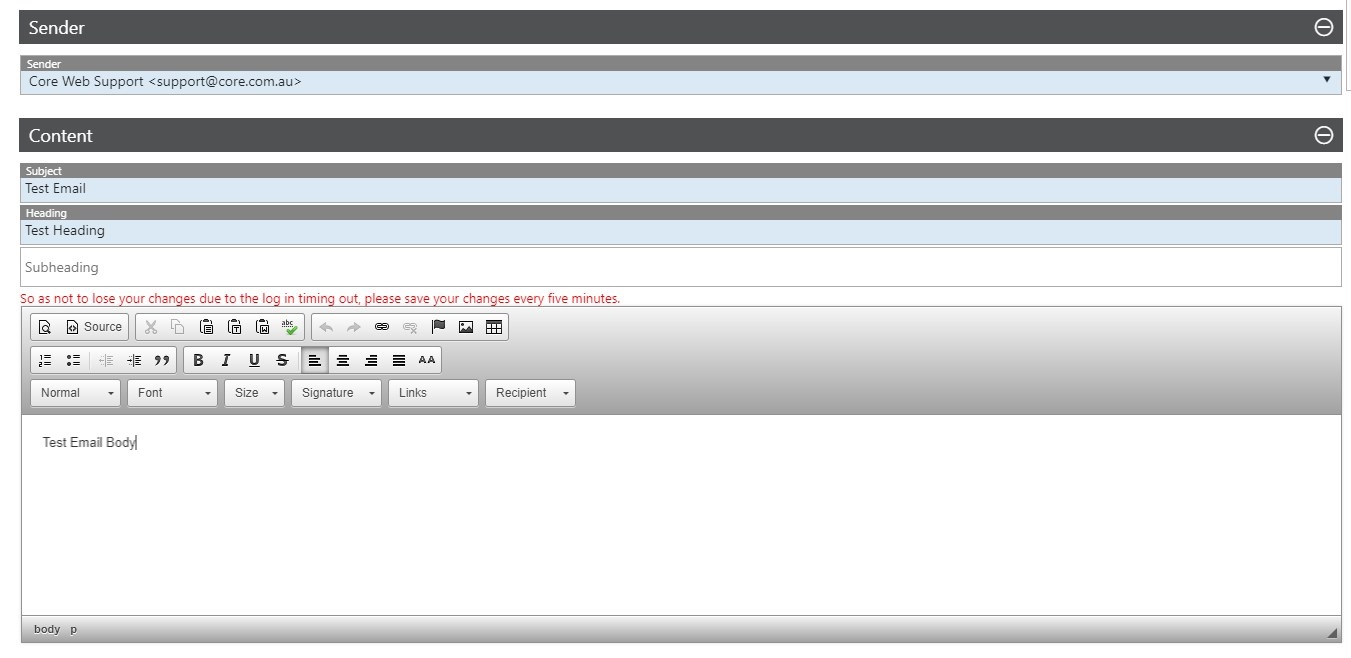
- Once you are satisfied with your email, press Next. Please note that you can Preview your email by clicking “Preview” at the top right of the window.
- At the final screen you are given the option of sending your email at a later time via the Schedule, you can also review your recipients and see a preview the email before it is sent. Your last step is to either send the email, or send a test. We always recommend sending a test email to yourself to ensure it looks exactly the way you want in your email client.
- Your email will be queued in the system. Emails are sent via a timed job every 5 minutes, however emails with a lot of recipients can take time – please give the system at least 20 minutes to run its task. You are done!
SMS Instructions
In this circumstance, when in the User Admin section, SMS and SMS all can be used to send out mass text communication to your agencies employees. SMS can also be used to communicate with Contacts, which will be covered in the Contact Guide
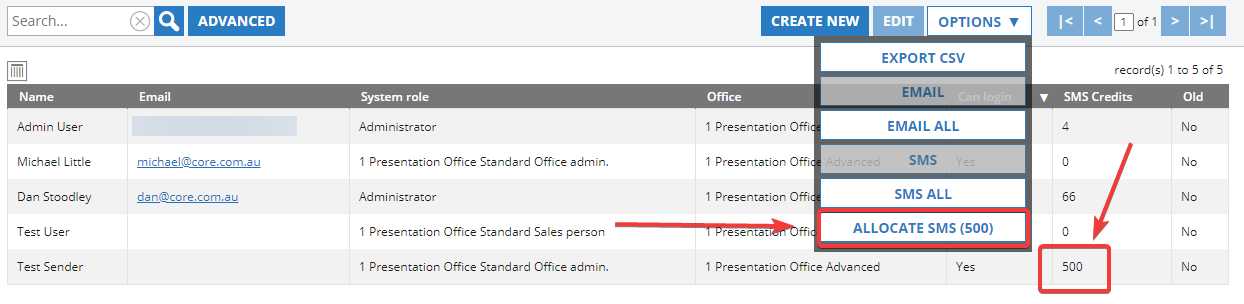
Note: This option will only appear with a User selected in the User list. It is also important to note that to send an SMS, the currently logged in User must have credits to be able to do so. You can check Users SMS credits under the User Admin/Users section as below. If the User you wish to send from does not have credit, they can have it allocated to them via the “Allocate SMS” option detailed at the bottom of this guide.
- If you have the appropriate credits available, select a User then click SMS. You are presented with the window below:
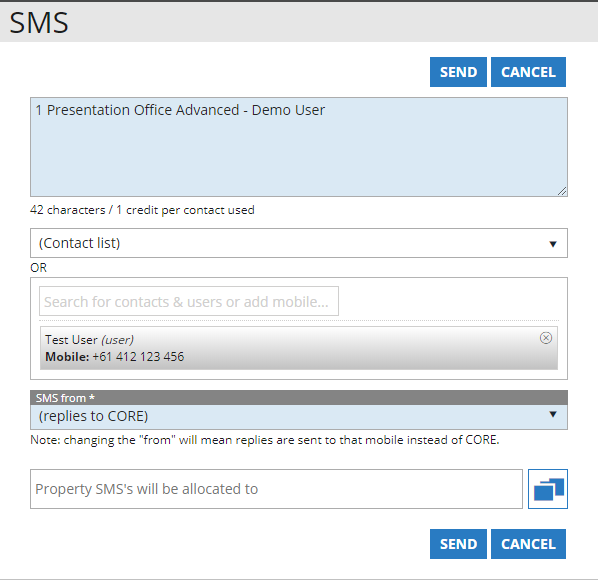
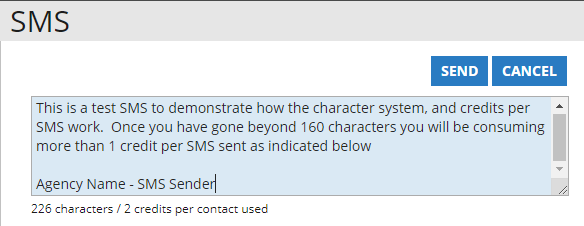
- The body of the SMS is displayed at the top of the window. It will add your “Signature” which is your Office Name – User Name. Write the body of your SMS above the signature, or remove it completely if you wish. At the bottom of this box you will see a live view of the number of characters used. The character limit of an SMS is 160 characters. If you go past this you will be charged for 2 credits per Contact/User SMS’d. The live update will increment to show you exactly how many credits you will be consuming
- Below this, you can either choose a Contact list to send to, or the User that we had selected is already in the list. For this example we will continue with our selected User, “Test User”

- Next choose who you want your SMS to come from. Please be reminded that if someone responds, it will be sent to this number and received on the device associated with it. All Users with a mobile number will appear in this list. Please note that the SMS From User does not actually need to have SMS credit. It will be taken from the User performing the task. Think of this as a Send on Behalf. Please also note that SMS responses to the “(replies to Core)” option is currently not supported for replies from users. We recommend sending from a real mobile number. This functionality does work when sending to a Contact. Screenshot below of the SMS From section:

- Finally, if you wish the SMS can be allocated to a Property from a marketing cost perspective. In this example we will not select this item.

- Once done, press Send.
SMS All Instructions
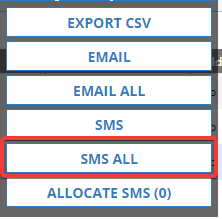
- The same functionality as the “SMS” option but will automatically send to all filtered Users in your User List. Please see the SMS instructions for general configuration
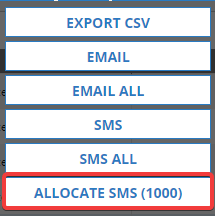
Allocate SMS Instructions
To be able to allocate SMS credits, your Office must first have them available. To purchase credits, please contact Core Support on support@core.com.au or call 1300 267 393
If your Office has SMS credit available, dependant on your User permissions you are able to allocate them to other Users of the system. To check if there are credits available, select Office Admin/Office Details. In this example you will see that 70 credit are already allocated to accounts, and there are now 1000 available to be allocated. The total available is 1070
- Select the “Allocate SMS” option from the drop-down – a User does not need to be pre-selected here. Note that the amount of available credit to allocate is listed – 1000 allocatable credits in this example

- Enter the quantity of SMS credits you wish to allocate. 1 credit is equal to 1 SMS.
- Select the User you wish to allocate the credit to
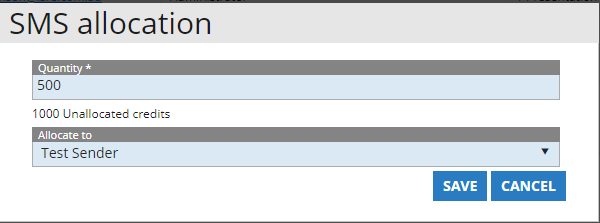
- Press Save. Note that the “Test Sender” User now has 500 credits, and the amount available has dropped from 1000, to 500.