Purpose
To allow for the mass importing of contacts from a CSV File.
Instructions
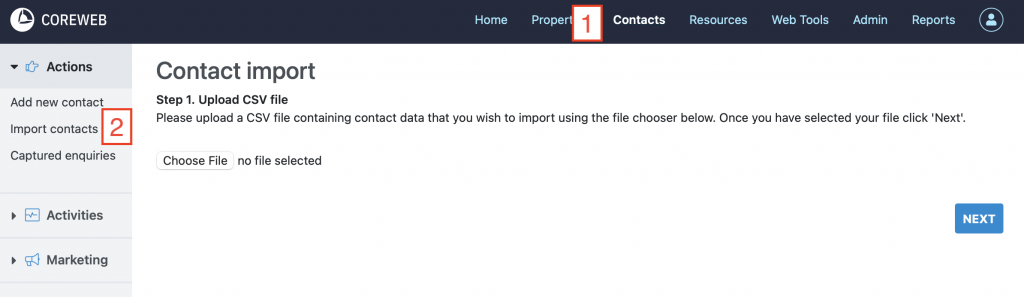
- Clicking Import Contacts will show the screen below. Click Choose File to browse for your CSV.
- CoreWeb can important a CSV file in any format you have available.
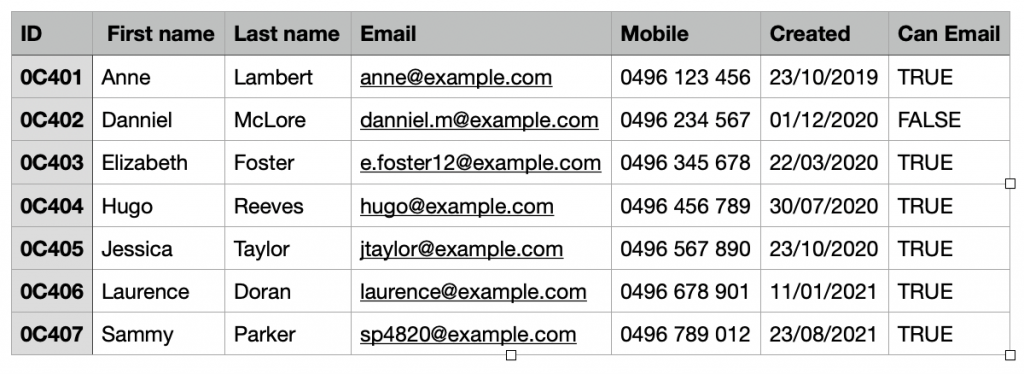
For this tutorial, we will be importing the sample CSV file below. A few things to note:- The “ID” column contains the ID of the contact in the external system you are importing from. Including this data in your import will help match up your contacts in CoreWeb with your external system.
- The “Created” column contains the date the contact was added and should be in DD/MM/YYYY format.
- The “Can Email” column indicates if the contact is to be subscribed or unsubscribed to emails, this can data should be provided in TRUE/FALSE Y/N or 1/0 format.
- After selecting our CSV file and clicking “NEXT”, our following step are to:
- Configure how the system will detect duplicate contacts
If you import contains ID’s from an external system, it is recommended to detect duplicates via these import ids (see screenshot). Otherwise, choose to match duplicates based on the contact email and/or phone number. - Match fields in the CSV file with fields in the CoreWeb system
In our example CSV, the first column ID, is the id of the contact in the external system. This needs to be mapped to the “Import No” in CoreWeb. The Created date in the CSV maps to “Date registered” in CoreWeb. And “Can Email” maps to “Is Subscripted”. The remaining fields are straightforward. If you need any assistance in how to map fields in your CSV to CoreWeb please contact us at support.

- Configure how the system will detect duplicate contacts
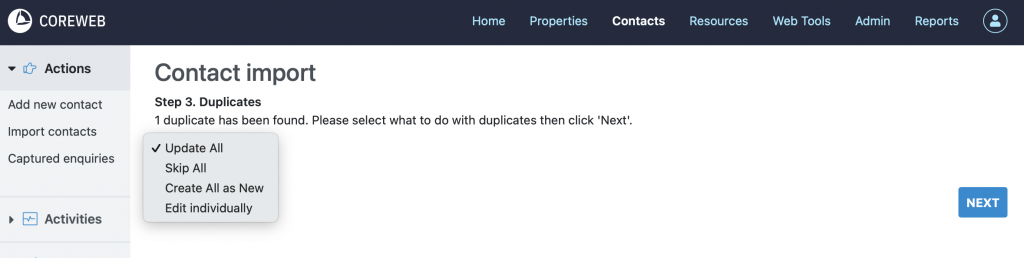
- After configuring the import the next step is to choose how duplicates are to be processed. In our example, we choose “Update all” to update our duplicate with any changes made in the external system.
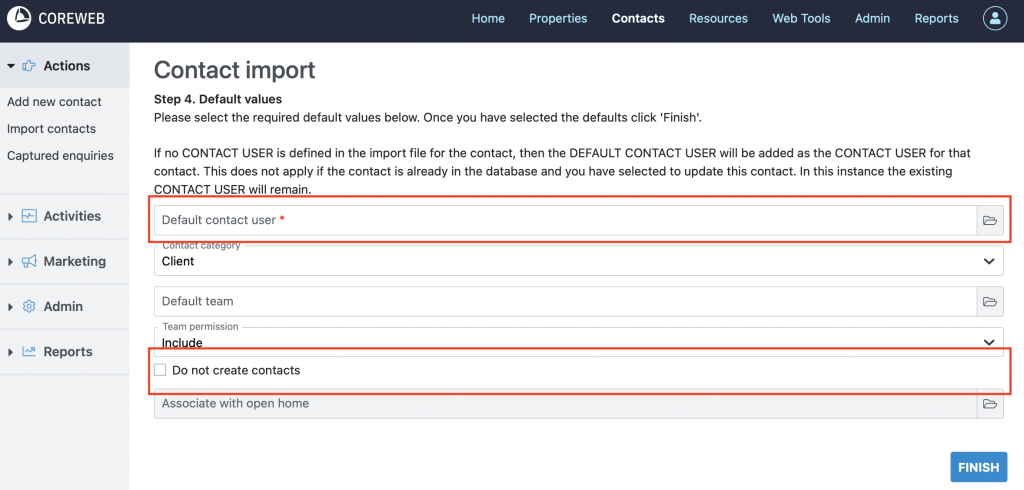
- On the final step, choose the user account the contacts are to be linked to. This should be either the agent or admin managing this list of contacts. Also, you have the option to only update existing contacts and not create any new records. This is useful if you’ve made an error in a previous import and are running a second import to correct the contact records.
ADVANCED – Setting a Contact Type when importing
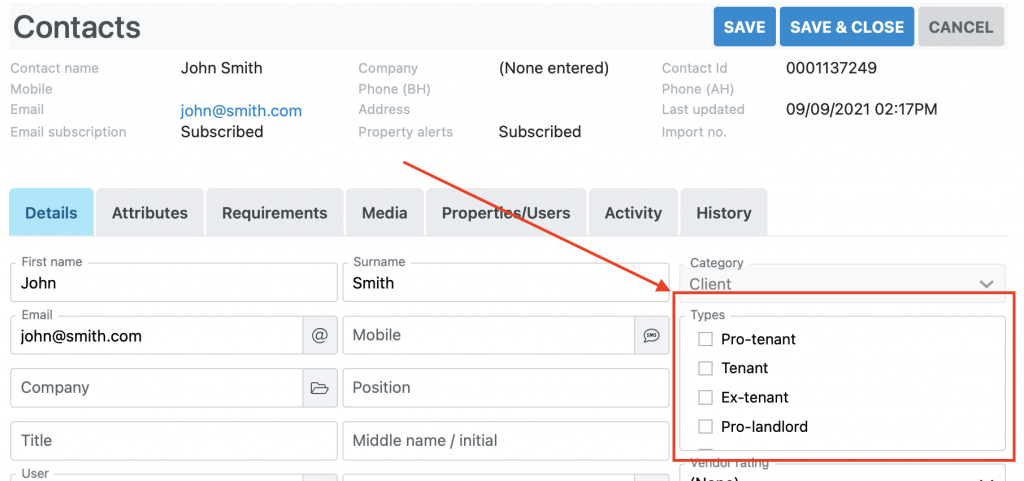
Often when importing contacts we want to set a specific contact-type(s) for the records. E.g. Vendor, Buyer, Landlord and so on. See the screenshot below for the list of available contact types in CoreWeb.
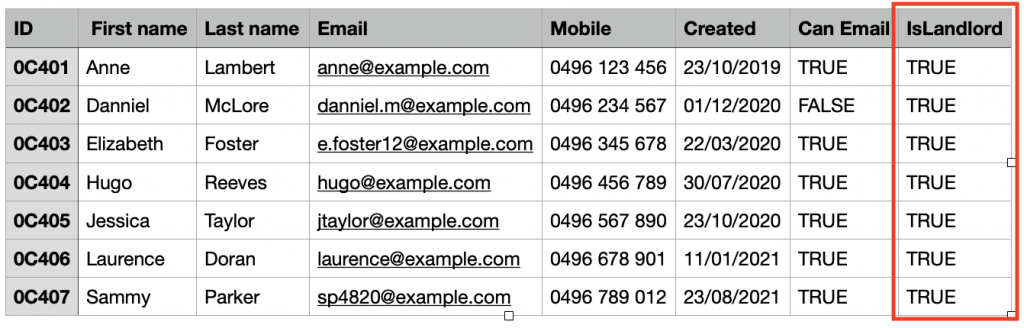
- To set the contact type, add an additional column to your CSV file. The name of the column is mapped by CoreWeb to the contact type when running the import. As an example if you want to set all your contacts to type Pro-landlord, name the column IsProLandlord. Or, for Buyers, name the column IsBuyer. And for Vendors, IsVendor, and so on. Here is our example CSV file with an “IsLandlord” column added and set to true for all records.
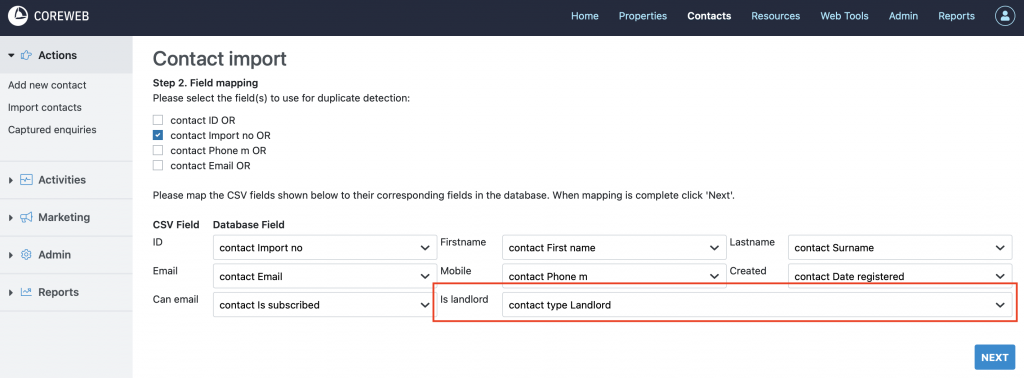
- After uploading the CSV file you can see CoreWeb has detected the new column and mapped it to the Landlord contact type.
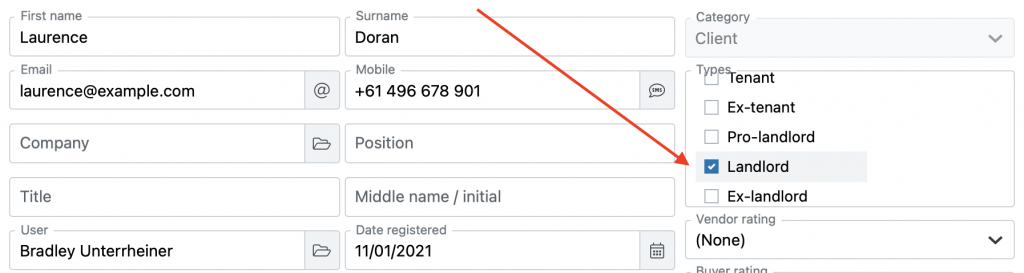
- And after completing the import “Landlord” has been set for the contacts.
ADVANCED – Setting a Contact Attribute when importing
Contact Attributes are a custom list of options that you can create and toggle on/off for your contacts. They can also be set when importing contacts from a CSV file.
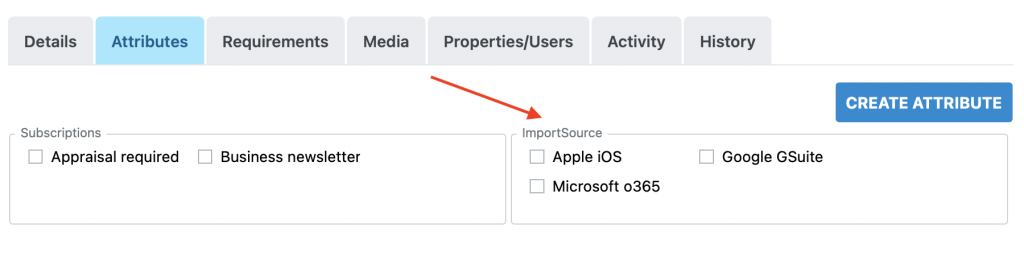
- In this example we will set an attribute for all contacts in a list which tracks which external system the contacts were imported from. I have create a custom attribute named “ImportSource” as below with a set of options.
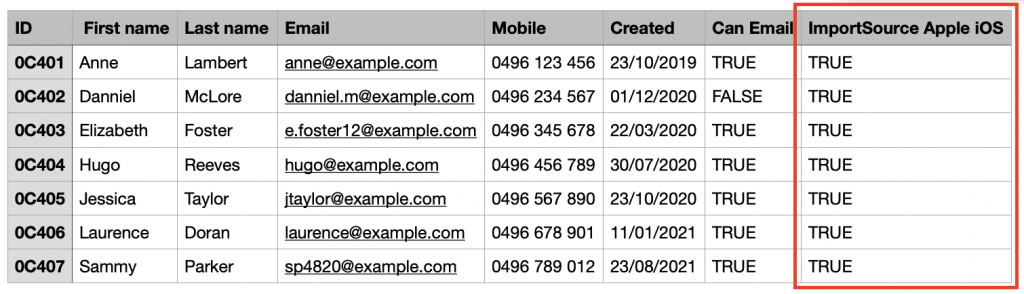
- I add an additional column to my CSV file and name it after the option I want to set. In this case my contacts are being imported from an iPhone, so I name the column “ImportSource Apple iOS”.
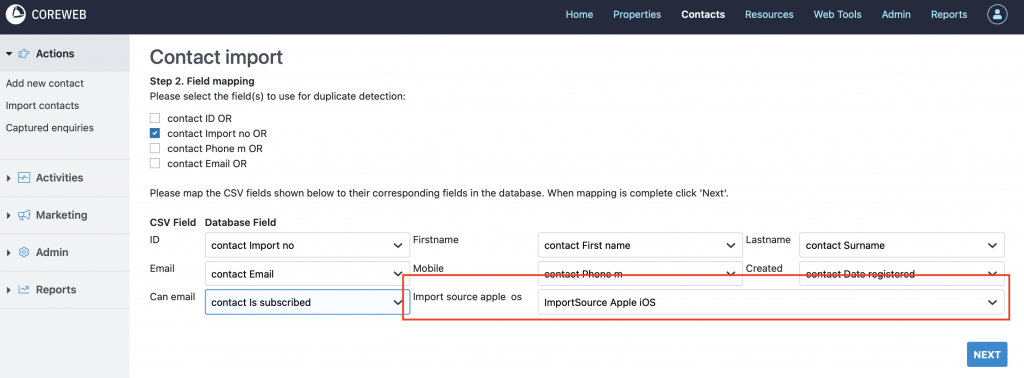
- After uploading the file, I then map this new column in the CSV file to the “ImportSource > Apple iOS” custom attribute in CoreWeb.
- And after completing the import “Apple iOS” has been set for the contacts.
