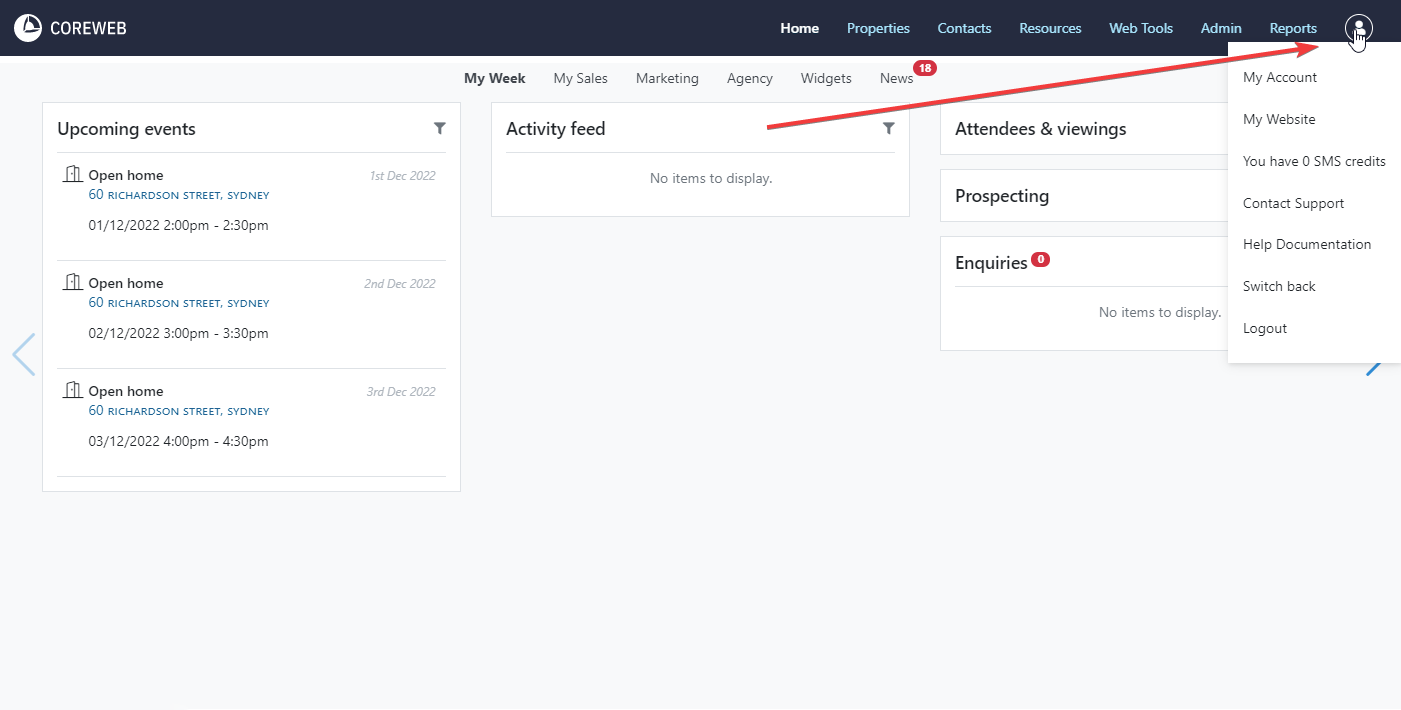
My Account
Purpose
To provide an ability to change personal settings on your own User Account. The most used functions of this screen would be to change your password after it has been reset for you, enable or disable Two Factor Authentication (2FA) on your account, download your contact card, or turn change your options in relation to the automatic capture of enquiries into Core from external sources.
Instructions
Instructions will be broken down into each major section
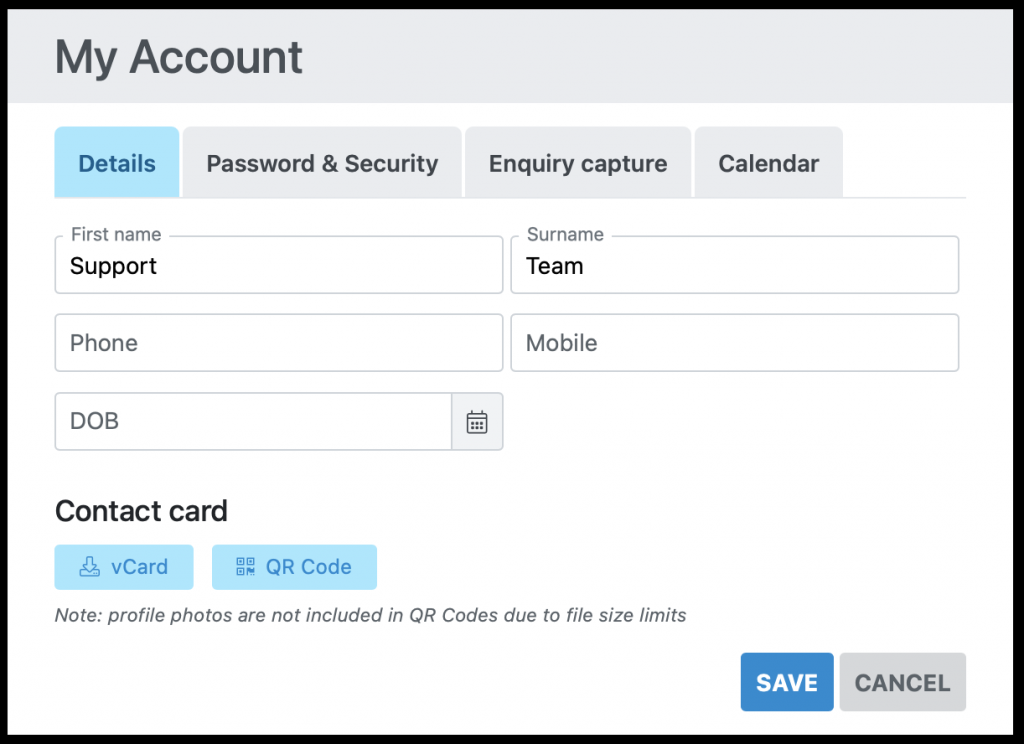
Details
- First name, surname, phone, mobile and DOB are all editable here. Simply change as needed then press Save to finish
Contact card
- You can download a contact card with your details, in either a vCard or QR code format. This makes is easy to share your contact details with your customers. The vCard file is best shared via email or Airdrop via your phone. For the QR code, have your customers scan this image using their mobile device.
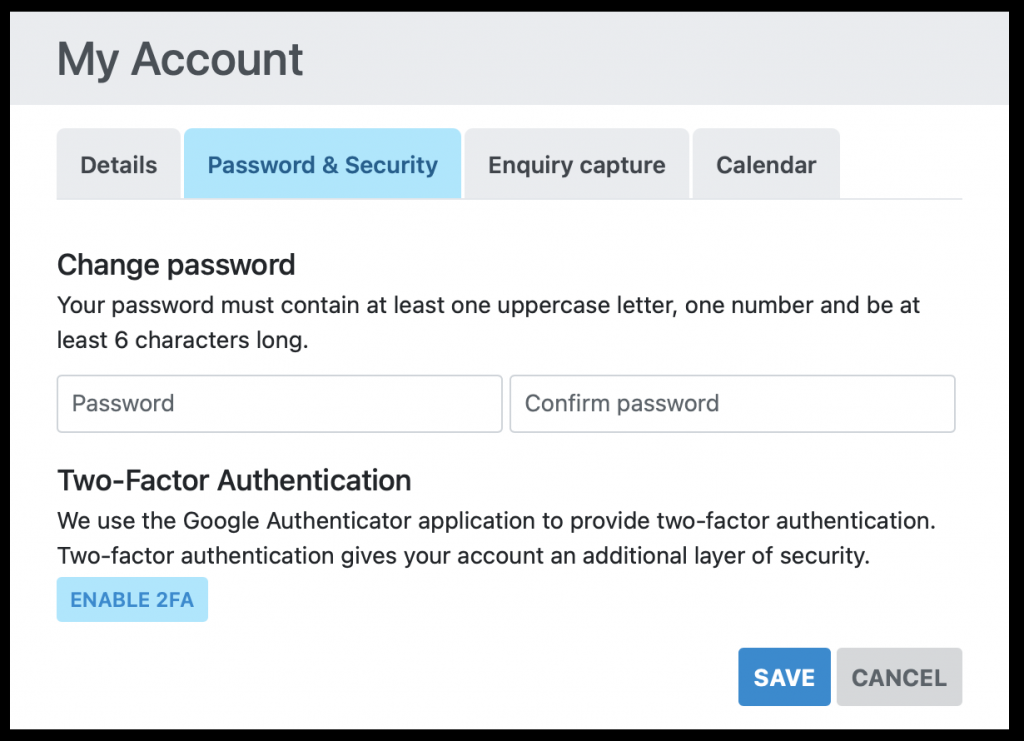
Change Change
- Enter your new password in twice into the supplied fields, then press Save
Two-Factor Authentication
- Download the Google Authenticator app to your phone before proceeding. Once installed, click the “Enable 2FA” link.
- You will be presented with the following popoup window. Note that the image in the centre has been blurred, but left in place for illustrative purposes
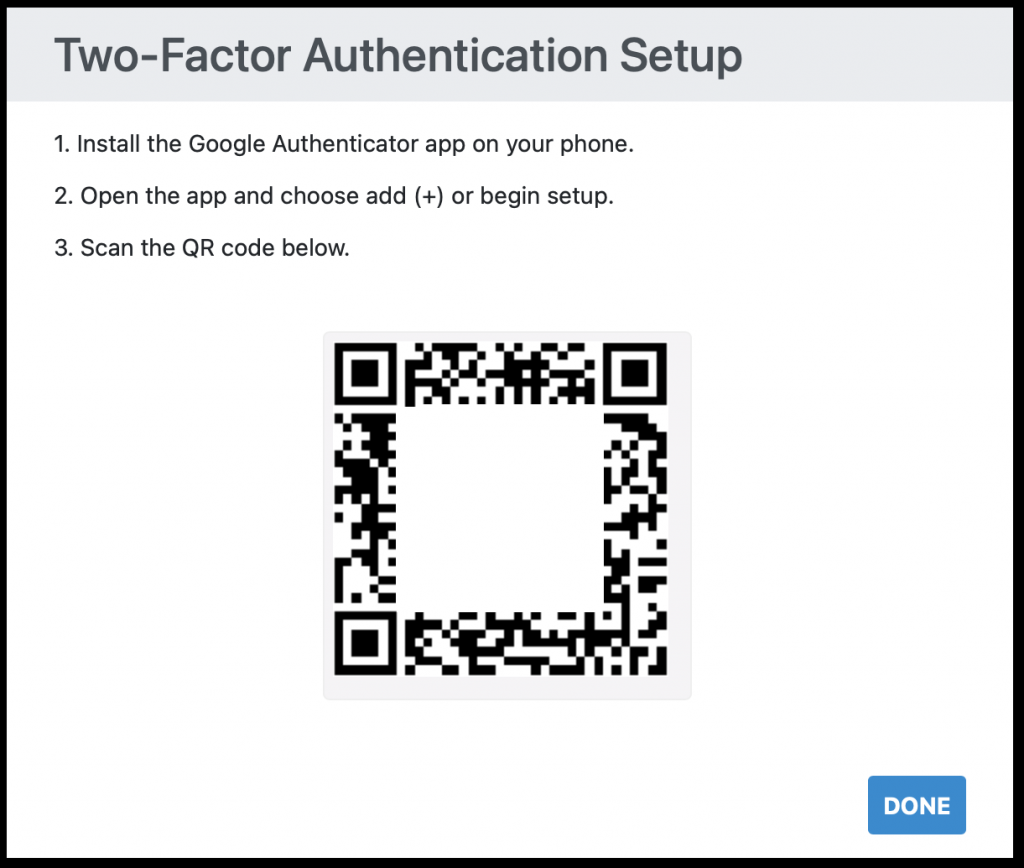
- In the Google Authenticator App on your phone, press the + Symbol to add a new 2FA source
- Select the Scan a QR Code option. Your phone will want to take a photo
- Point your phones camera at the QR code on your screen and follow the prompts in Google Authenticator to continue.
- Once done you will need to open Google Authenticator and enter in the 6 digit 2FA code each time.
- If you ever uninstall the Google Authenticator app, or get a new phone you may need to contact Core Support to help you get this feature set up again.
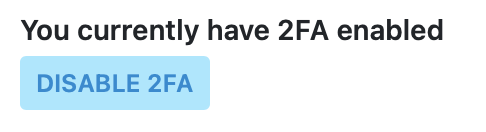
- Once on, the Enable button changes to Disable 2FA, indicating that you have turned it on as below:
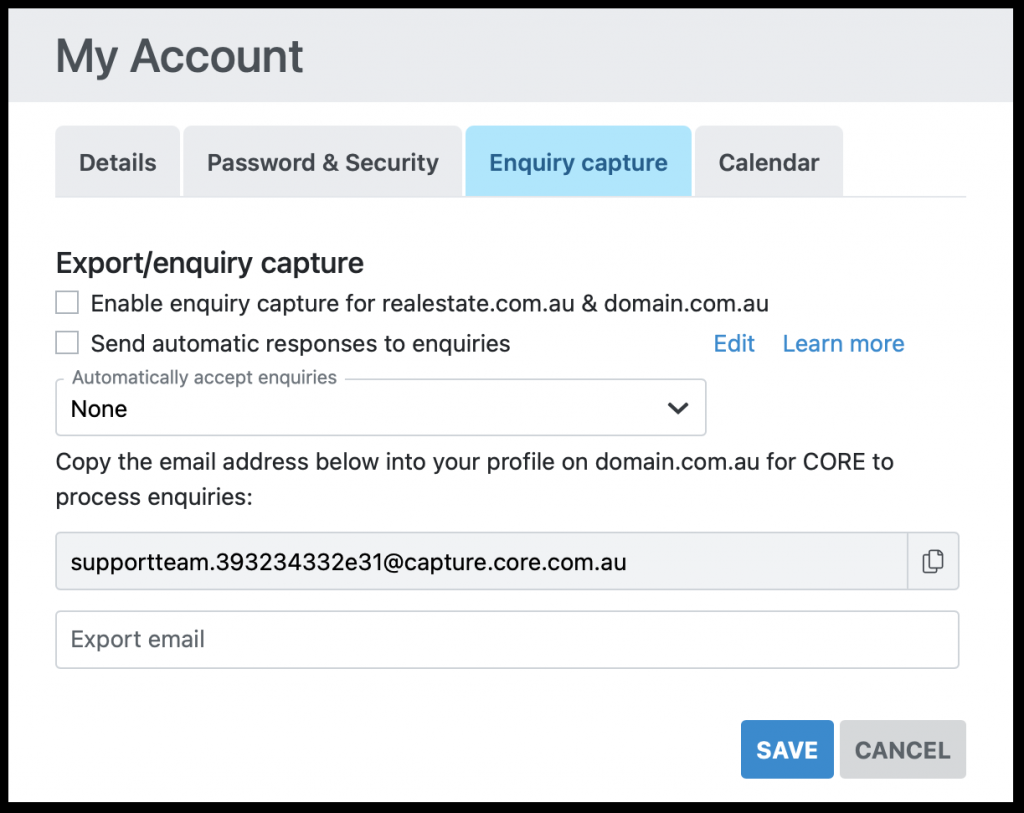
Enquiry Capture
Allows you to link the REA and Domain Enquiry systems into Core. Enquiries sent via these portals will be picked up by Core and stored, accessible via your Home screen. Any enquiries accepted into the system will be automatically placed against the Property, Contact and User. Doing this helps build your Contact Database for future communication with your clients. To set this up it would be best to speak to Core Support directly as each agency’s configuration can be different.
Automatically Accept Enquiries
If you have REA and Domain enquiry capture set up on your account, you can tell Core what you would like to do with the incoming contact automatically. The options are to accept:
-
- None – Meaning all incoming enquiries will need to be manually checked and accepted into Core. This is good if you get no spam enquiries.
- For Existing Contacts – Contacts with a name and email address or phone number will have their enquiries automatically accepted.
- For New and Existing Contacts – Core will accept everything automatically. If you are prone to receiving spam enquiries then this option is not suggested.
Note: Export/Capture enquiry is specific to REA and Domain. If you need to use this, it is configurable here – it would be best to speak to Support for assistance in this matter.
Send Automatic Responses to Enquiries
CoreWeb can automatically send email responses to your enquiries. Click edit to customise the auto-response which is used for your account.
- After making any changes to this section, once you are happy with them press the Save button.

Calendar export
CoreWeb provides a calendar feed you can use to synchronise your tasks and diary in CoreWeb with your computer or phone.
Copy to address for your calendar feed in CoreWeb, then follow the instructions below for your device:
- Import or subscribe to a calendar in Outlook / Office365
Learn how to import or subscribe to calendars in Outlook.com. - Subscribe to calendars on Mac
In Calendar on your Mac, subscribe to calendars published or shared by others. - Sync your calendar with computer programs – Calendar Help
You can get your Google Calendar events with other computer applications.
My Website
Purpose
To give you quick access to your agency website
Instructions
Note: This item must be configured by Core support. Please let us know what website you’d like to have listed here so that it can be added for you.
- Once this is configured, simply click the link to be taken to your web site.
You Have X SMS Credits
Purpose
To quickly let you know how many SMS credits you have available. 1 credit = 1 SMS. An SMS is 170 characters, so anything above this will consume more credit.
Instructions
- Hover over the “Me” icon and your credits will be displayed. This item is for display only and is not clickable
Contact Support
Purpose
To provide access for contacting Core Support. Alternative to this, you can always call or email.
Instructions
- Clicking the Contact Support icon brings up the following window:
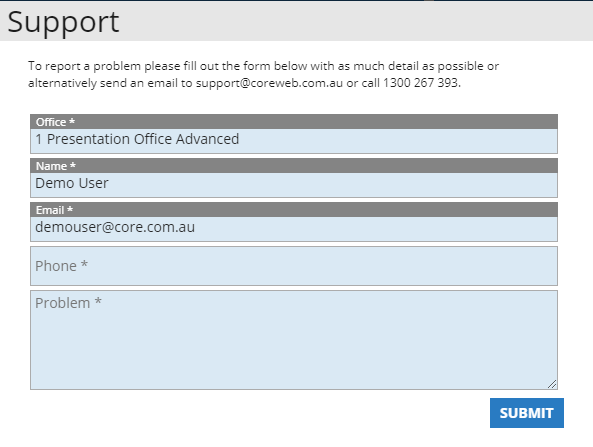
- The Office, Name and Email will be prefilled, depending on who is logged in. Please enter the best contact phone number to reach you, and a description of your problem. It is helpful to include a property ID, or other unique identifier for the issue in question.
- Once done, press Submit and a Core Support representative will be in touch.
Logout
Purpose
To log the current User out of the Core system
Instructions
- Press logout. You will be returned to the login screen.
Note: Only one account can be used at a time.