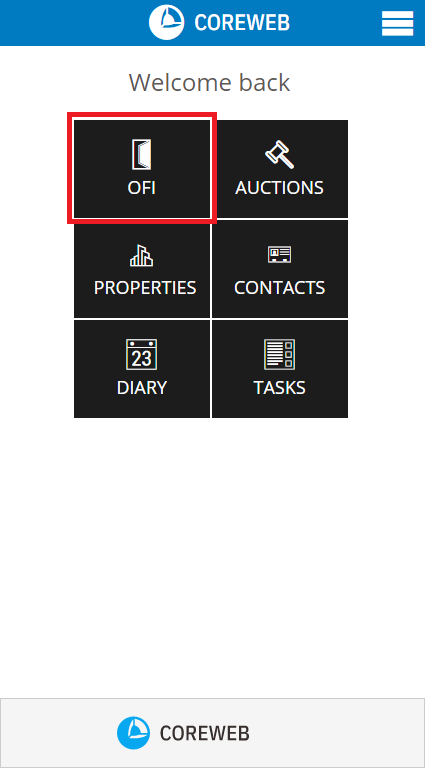
Introduction
The OFI area allows you to add the details of an Open For Inspection appointment and also capture the details of new or existing contacts that attend. The contact information captured here is valuable as it permanently adds new attendee details as a contact to the Core system for not only a quick follow-up with the property details post inspection, but long term communication on any other properties that meet their needs in the future. Existing contacts will have this property added to their Activities history, adding to your profile of them.
Instructions
Adding An OFI
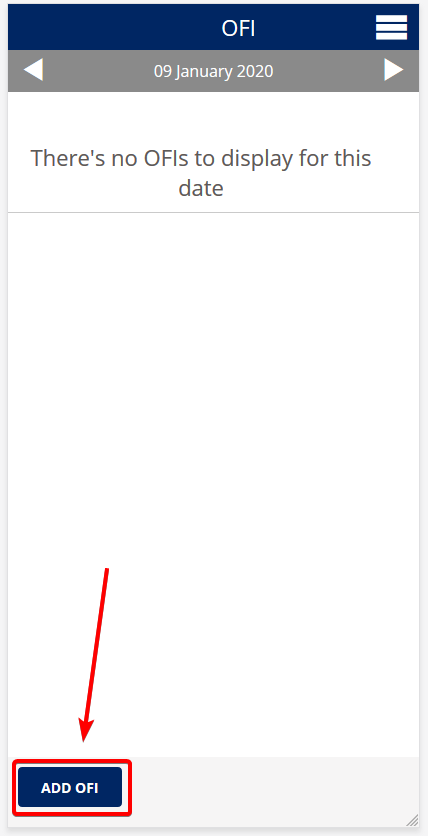
- On the OFI screen you will be presented with today’s date. If there are no OFI appointments, the system will advise, as below. Press the Add OFI button at the bottom of the screen
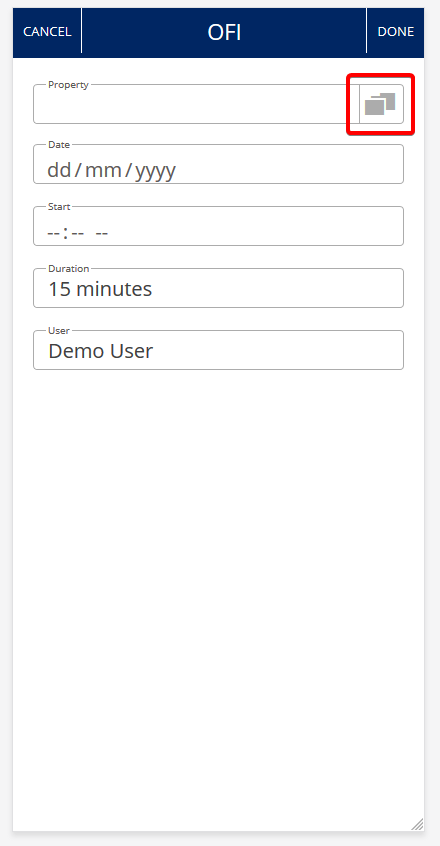
- At the following screen press the picker button to choose your property.
Note: The property needs to have been added to your system prior to be able to do this and should have been done through the Core web system.
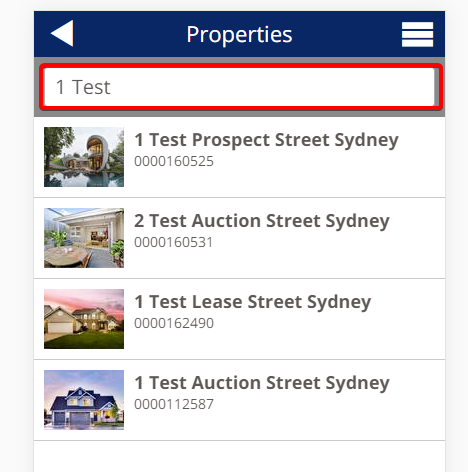
- You will be shown properties in your system. Each property will display the first image uploaded against it to assist in finding the correct one. You can click “Show More” at the bottom of the screen to retrieve more results, or the preferred option would be to use the Search field at the top. Here, type in some or all of the address and press your devices enter key. Results will be filtered:
- Once you have found your property, press it to select it. You are now back at point 2, but your property has been populated. In the date and start fields, enter the details of the OFI, then select the duration. You can change the Core User associated with the OFI on this screen as well.
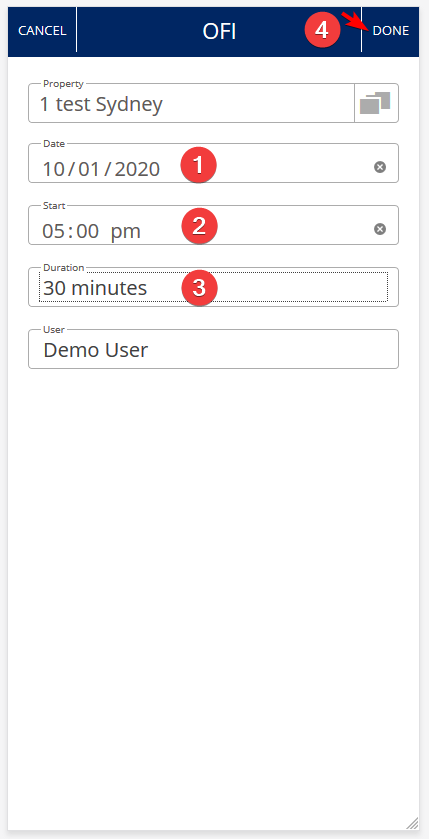
- Once you are happy that your information is correct, press Done. If you have made a mistake, you can edit by swiping left on the entry to edit it, or provide a vendor report once the OFI is over.
- You will now be back at the main OFI menu. using the date picker, select the date of your new OFI to see it. You are done.
Adding an OFI Attendee
You have either just added an OFI and wish to add attendees, or have preemptively set one up in the past and wish to do the same. Attendees can be added at any time, but this option will most likely be used on the day, live to capture attendee/contact details as they arrive. This is a powerful tool as detailed here.
There are two main ways to add attendees, separated left and right below:
Add Attendee Button (Bottom Left)

Launch Open Button (Top Right)

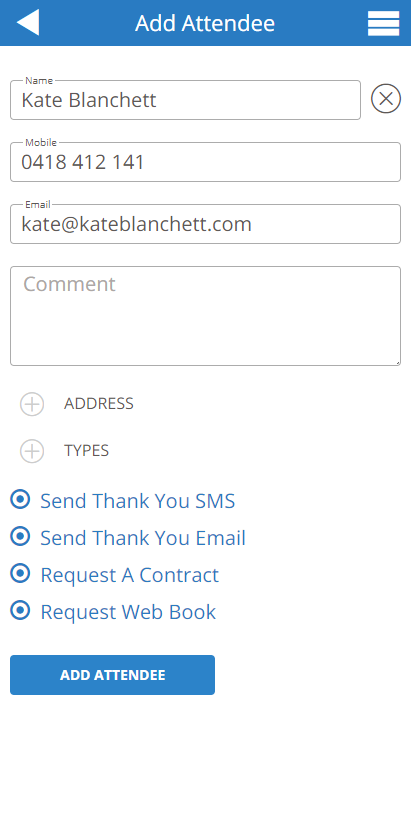
Enter the name of the contact. If they exist, contacts will preload for you to select. If they do not exist you can fill out their details and add them. Adding an attendee saves them as a contact in the Core system for future communications

Let your attendees register themselves! They can use their own device to scan the QR code to register. Once registered, their details will be saved against the open they are attending and their contact details added to the Core system.
If their mobile device doesn’t support QR, you can give them your device and have them press “Touch to sign in” This method does allow searching and matching against Mobile and Email details that are an exact match. This is designed so that the attendee isn’t presented with your other contact’s details, causing privacy issues.
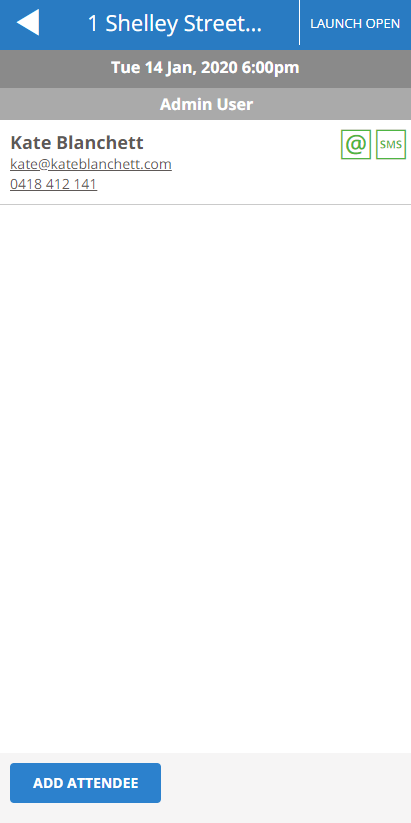
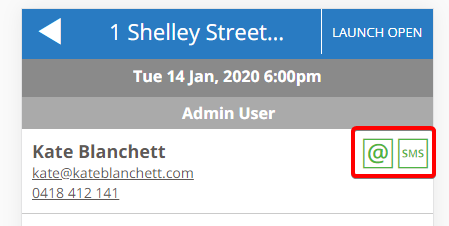
Once added, you will see your attendee listed back on the main screen. You will also see whether or not they will receive an email or SMS after the OFI concludes.
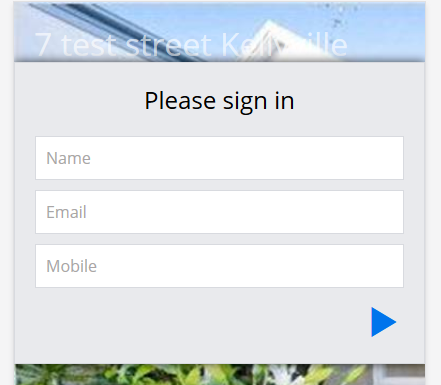
Have the attendee enter their Name, Email and Mobile number. This automatically will send them an email and SMS at the conclusion of the OFI
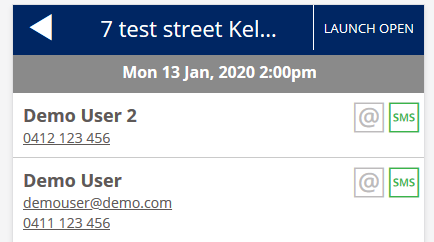
All registered attendees will continue to populate the screen until you are done.
Using either method above will ultimately achieve the same result. The Add Attendee route will allow you to capture more detailed information, however if you do want the attendees registering themselves as a more visually appealing method you can always edit their information later on if you wish.
What Happens After The OFI Finishes?
If details were captured correctly, anyone with Send Thank You SMS, Send Thank You Email, Request A Contract or Request a Web Book will have these sent to them. This happens automatically around 20 minutes after the OFI has been programmed by you to finish. These options will only appear as selectable if they have been previously configured for your agency. To get this configured, it is best to get in touch with Core Support on support@core.com.au or call us on 1300 267 393